Friday, December 30, 2011

Birthday present craft

I tried out another Pinterest craft for my mom's birthday present. She is rather obsessed with the saying "Live, Laugh, Love" so here goes...

 Purchase some canvas. Mine are 8x10 and were on sale 2 for $4 at Hobby Lobby.


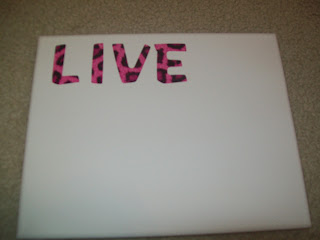
Find letters or cut out your own from vinyl with a nifty Cricut. I don't have a Cricut, but found these el cheapo letters for $1 at Dollar Tree. 

Position letters on the canvas. Make sure they stick well. 

Get some pretty paint. These match my mom's room. 

Pour your paint in a disposable bowl left over from your move 6 months ago. :) Get out your handy sponge paintbrush 'cause they're fabulous.


Completely paint over the letters. Don't forget the sides of the canvas. 


Note- apparently you should not use the $1 sticker letters as they do not stick well and allow paint to seep through. REDO!


Ta Da! Also in hindsight, you should not paint yellow over white. Hmm... Guess I'll be re-doing that one, too. Eventually.

Anywho- the concept is an easy one and you can make anything you like with it. Go craft away!

Thursday, December 29, 2011

Embrace the Camera 12.29.11

Embrace the Camera!

I've been really slacking on this so here we go. Sharing our family Christmas photos today. Enjoy!


A belated Merry Christmas from our family to yours!

Go link up with Emily here Anderson Family Blog

 embrace the camera

Sunday, December 18, 2011

The importance of a Christmas tree

I finally got our Christmas tree decorated tonight and I just love it.


I'll be honest, I really hate fluffing the tree. You know- arranging all the branches
 so your fake tree looks nice and plump and filled out. It's pokey and annoying and tedious
and I grumble the whole time I do it.

This year, we used AJ's tree. It's about 6 feet and pre-lit. Easy peasy.
My tree is 8 feet and amazing. I got it for $5 at a garage sale. It's old and sheds a lot, but it's hugantic and that makes it fabulous.

Anywho. I didn't put all the ornaments on because this tree is smaller and the branches
are much more flimsy and had some trouble with the heavier
ornaments. I also haven't unearthed AJ's ornaments yet, but I have some of mine
from years past and all of our family ones and
Tate's 1st Christmas ones.

Growing up, my mom always got us each a special ornament- typically
having to do with an interest that year. I have little smore creatures caroling,
eeyore, big bird, dogs, and misc fun ones. I got to take these with me
when I moved out on my own and hanging them up is a little
reminder of Christmases growing up.

I also have random ornaments that I bought on sale over the last 2 years. They don't have
any special meaning, but I like them anyways.
I also have jingle bells and candy canes that I used as filler for my
gigantic tree since I started out with an 8 foot tree and only about
20-25 ornaments. I love the bells and candy canes.
They remind me of how far I've come over the past few years.

I love Christmas. The music, the tree, the ornaments, the lights, the decorations,
and the general spirit of giving and loving.
The time with family that you never forget. And the traditions.
Every year I get Tate an ornament just like my mommy did for me
and I know someday when they leave my tree, I'll be sad, but I'll have all these
memories to look back on.

I can't wait for Tate to start getting a little older and really begin to
understand what Christmas is all about. I was hoping
to do an advent wreath this year, but time got away from me. Next year.
And more ornaments, bigger tree, more lights, etc.
More Christmas spirit and more giving to others.

God bless you all this Christmas season.
May we all remember the real meaning behind CHRISTmas.
May you spend this time making memories with those you love.
Merry Christmas!

DIY calendar for $1

I just love Pinterest and all the ideas I've gotten from there! Here's my latest craft- a handmade calendar since I lost ours in the move.

We keep a family calendar on the fridge with doctor's appointments, therapy sessions, after hours work meetings, and traveling. Very helpful and I recommend for every family.


Supplies:
Large picture frame (mine's 11x13 I think)- $1 at Dollar Tree
paint cards- free at Lowe's
Scissors
 Cut small squares out of the paint cards- I just eyeballed one and used it to measure the others
 Lay them out in on the cardboard backing and then tape down with tape loopies
Note- I recommend painting or covering the cardboard with scrapbook paper, but I was lazy and didn't. I might go back and do that at some point. Or not.
 Ta da! Seriously, that was TOO easy!
 Then you can write on the glass with dry erase markers and make your calendar. The only thing I realized is missing is a place to put the month at the top. But, you should really know what month it is, so I'm just not going to worry about that. I guess you could make magnets or scrapbook paper strips with each month to put above the calendar. Hmm- might do that!

 It's also a great coloring place for your helpful toddler :)

Tate loved it! Might need his own to color on. 


Well, that's the cheapest, easiest craft I've ever done. Score! Craft away!
Oh, you can either hang this on the wall or put magnets on the back and stick to the fridge. Dollar Tree didn't have magnets, hence no magnets for me today.

Sunday, December 4, 2011

Make your own coasters

Here's my 2nd pinterest craft- homemade coasters as Christmas gifts for my co-workers.

Originally from this blog post: beneathmyheart.net

Here's my own picture tutorial. Enjoy and be sure to let me know if you make your own!


Step 1- buy white tile coasters. They sell for $.35 at Lowe's.
I got mine for $.05/piece at a local surplus store- bargain!
You'll also need: scrapbook paper or cute napkins, glue gun, spray adhesive, Mod Podge, scissors, ribbon, sponge paintbrush and a pen/pencil. 
 Step 2- make a stencil/pattern that you can use to measure your scrapbook paper.
I tried cardboard and ended up just using paper.
 Step 3- Trace your pattern onto the back of your scrapbook paper and cut out.
This was pretty time consuming. Note to self- purchase a paper cutter!
 Step 4- Once ALL your papers are cut out, break out your Mod Podge.
This was my first time using Mod Podge, but it's super easy.
Use a sponge brush (like the one pictured) and spread mod podge all over your tile.
 Step 5- Quickly place your scrapbook cut out on the tile, pressing down around the edges.
I found that I had to go back and press the edges down once more after it dried for about 30 seconds.
 Step 6- time for the backing. You can use felt, corkboard, or pre-cut circle thingies (which I couldn't find). I bought a huge roll of really thin corkboard for $15 and have tons left over for future craftiness. Cut out your corkboard or felt to be slightly smaller than your tiles.
 Step 7- love me some hot glue! Use your glue gun to hot glue your backing to your coaster.
I put hot glue near the edges of each tile and quickly pressed on the corkboard.
 Ta da! This one is not centered since I was trying to take pics while doing!
 Step 8- Apply another layer of mod podge over the whole tile- I found it best to use a THIN layer.

Step 9- Once they dry, apply spray adhesive (in a well ventilated area) to the tiles to make them waterproof. What good's a coaster that can't get wet?!
 And now just enjoy all my various tiles!


 Finally- Stack 2 or 4 together and tie with a bow. Give as gifts and you're DONE! I ran out of ribbon so mine aren't tied up all pretty yet. You can just enjoy the original blogger's pretty finished product.